OMNIA Engine
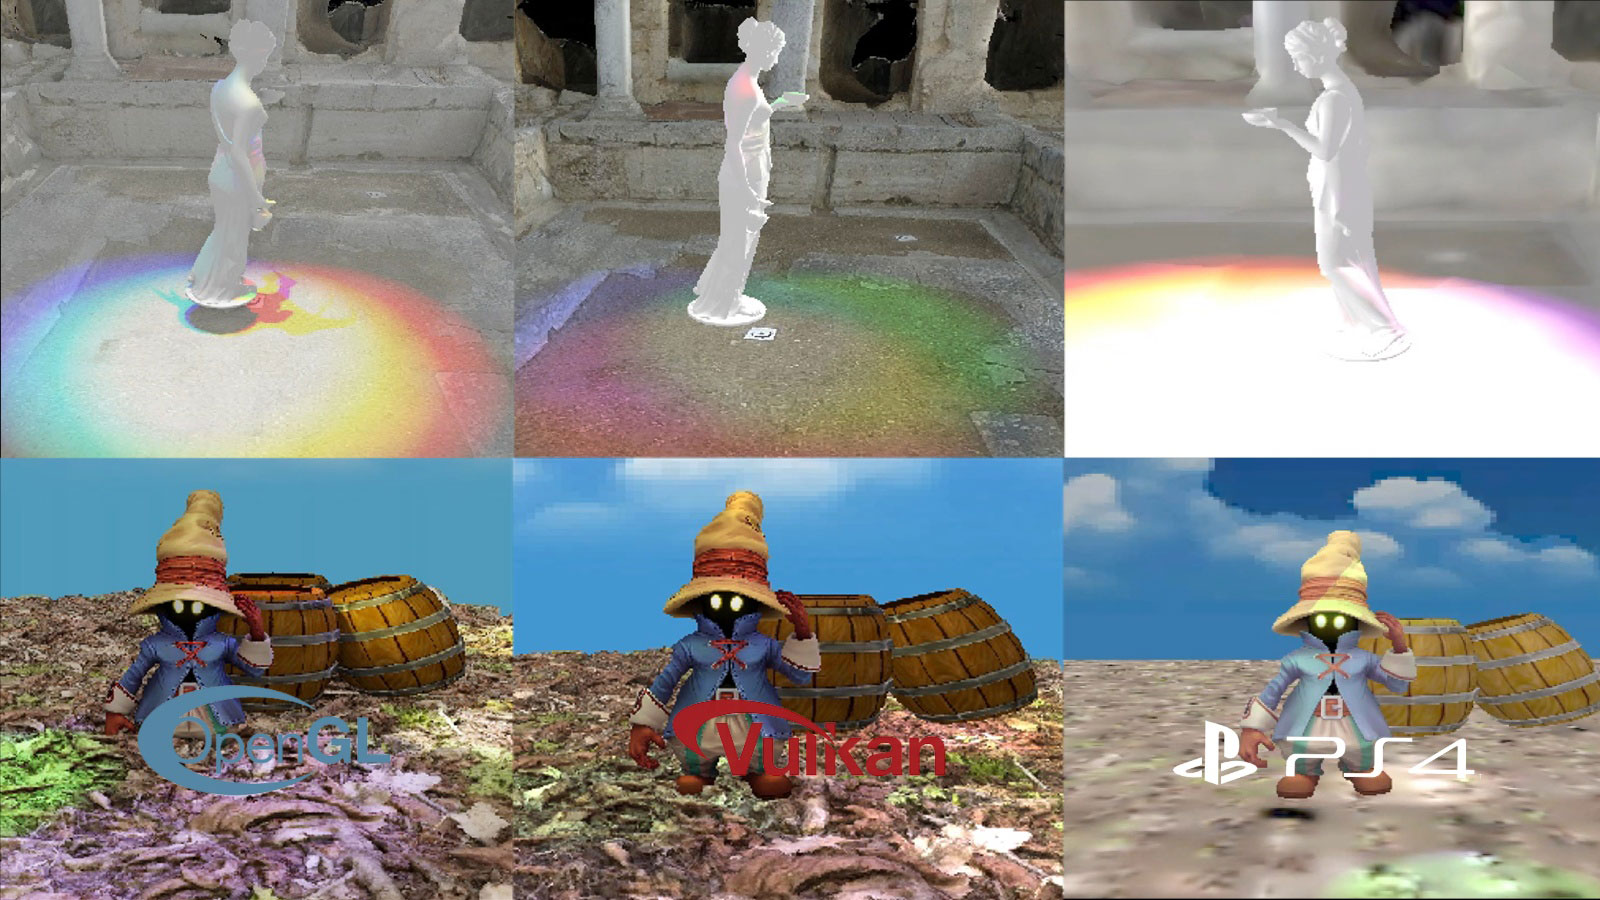
OMNIA is a Graphics Engine that renders in OpenGL, Vulkan y PS4. The Graphics Engine is multithreading and is made with C/C++ and has as scripting language Lua.
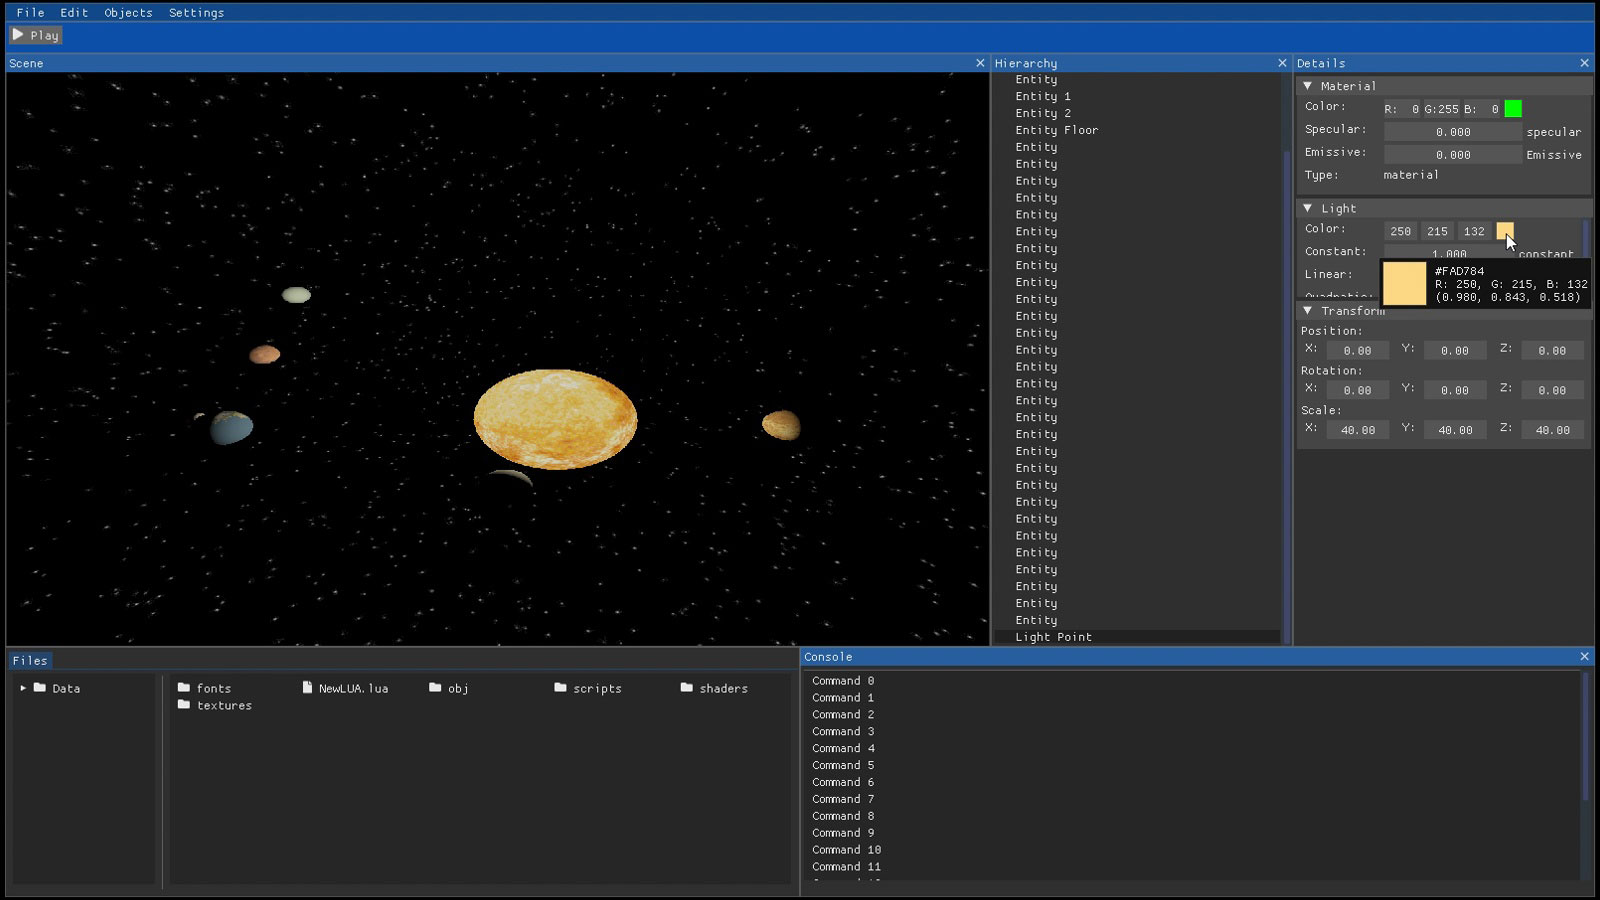
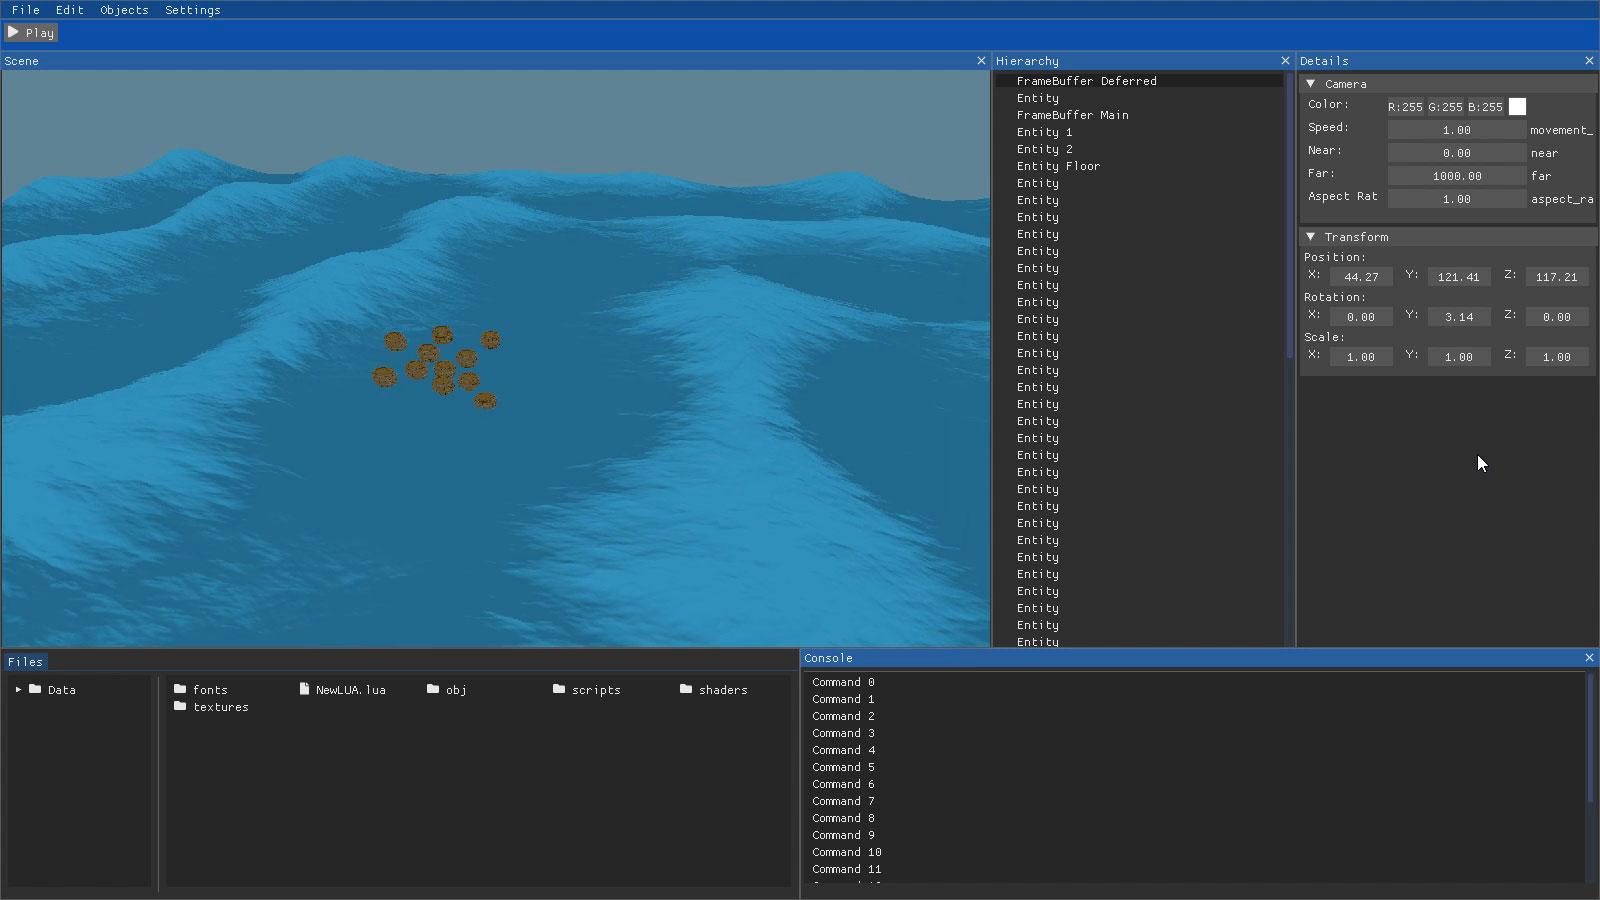
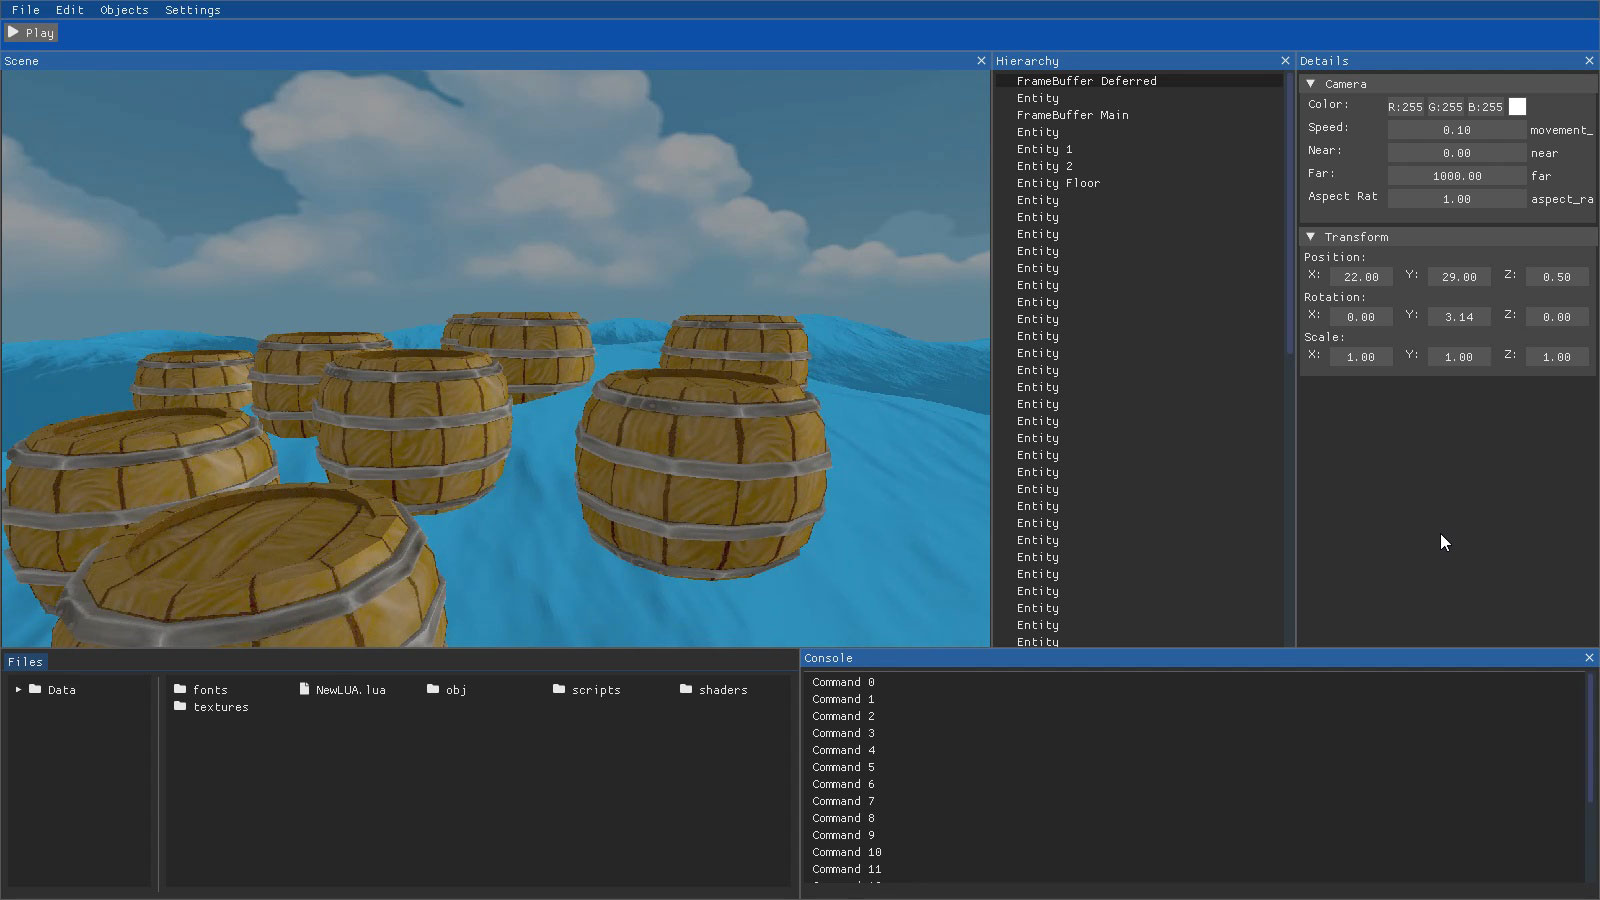
OMNIA allows the user to change the values of the different entities in the editor, the editor is made of Imgui. Some of the values that can be modified include position, rotation, scale, in addition to the values of each material such as the color of the objects, their specularity or whether they are emissive.
You can view the folder hierarchy and its contents as well as manage the content, creating, deleting, editing and opening files.
Features
- OpenGL
- Vulkan
- PS4
- ECS
- Transform Parent
- Lua Scripting
- Imgui
- Multithread
- Deferred Shading
- Direcctional Light
- Spot Light
- Point Light
- Light Volume
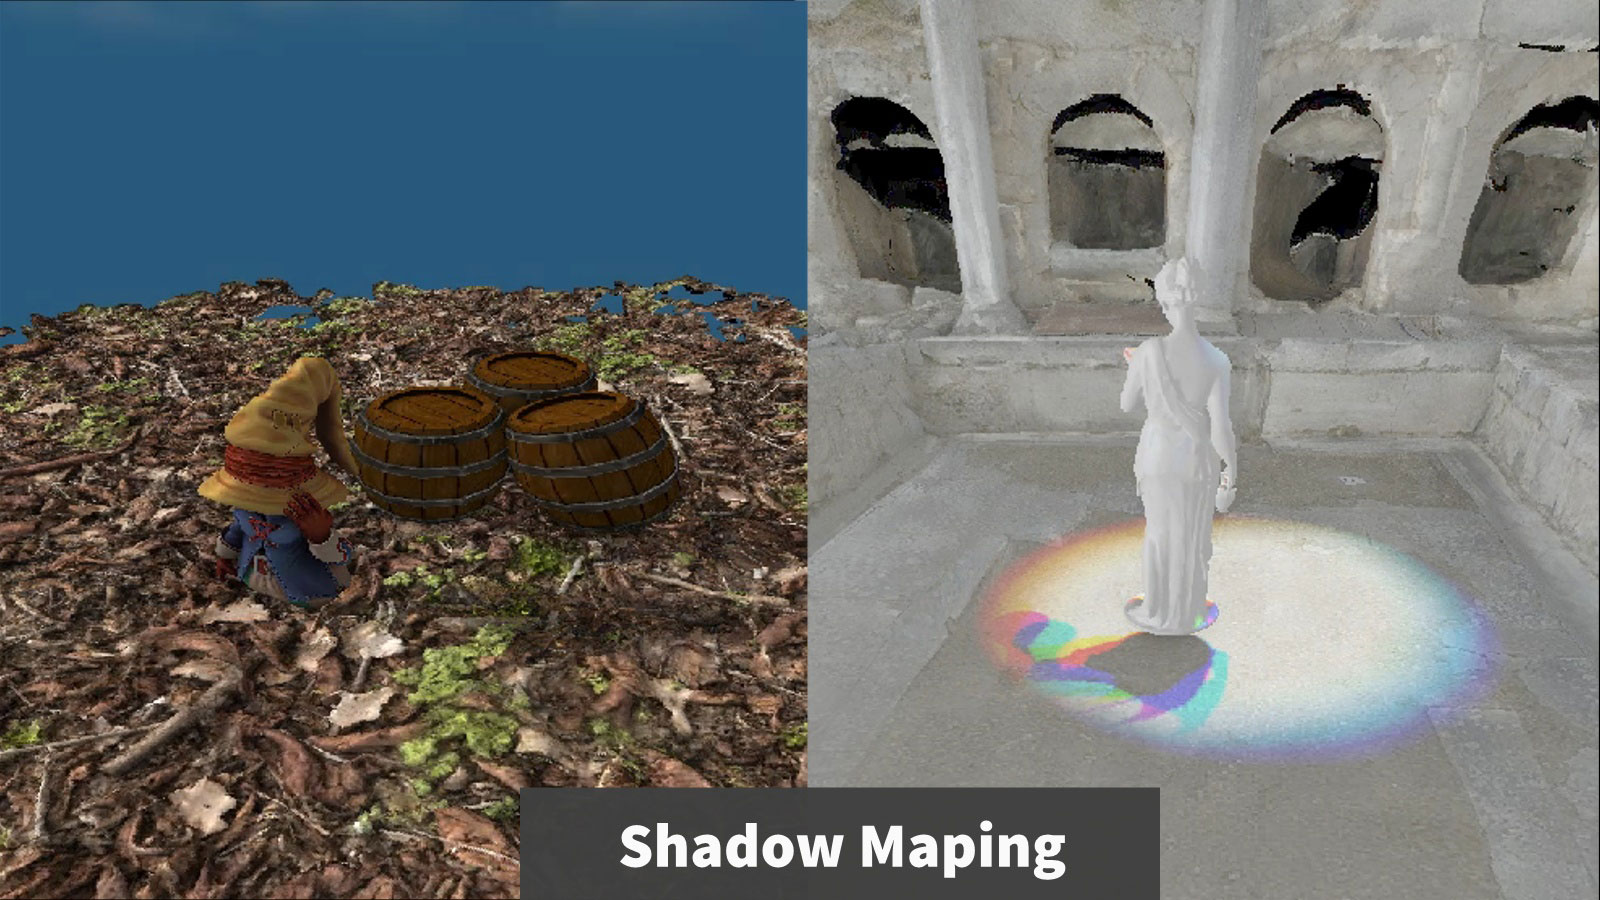
- Shadow Mapping
- Normal Map
- Skybox
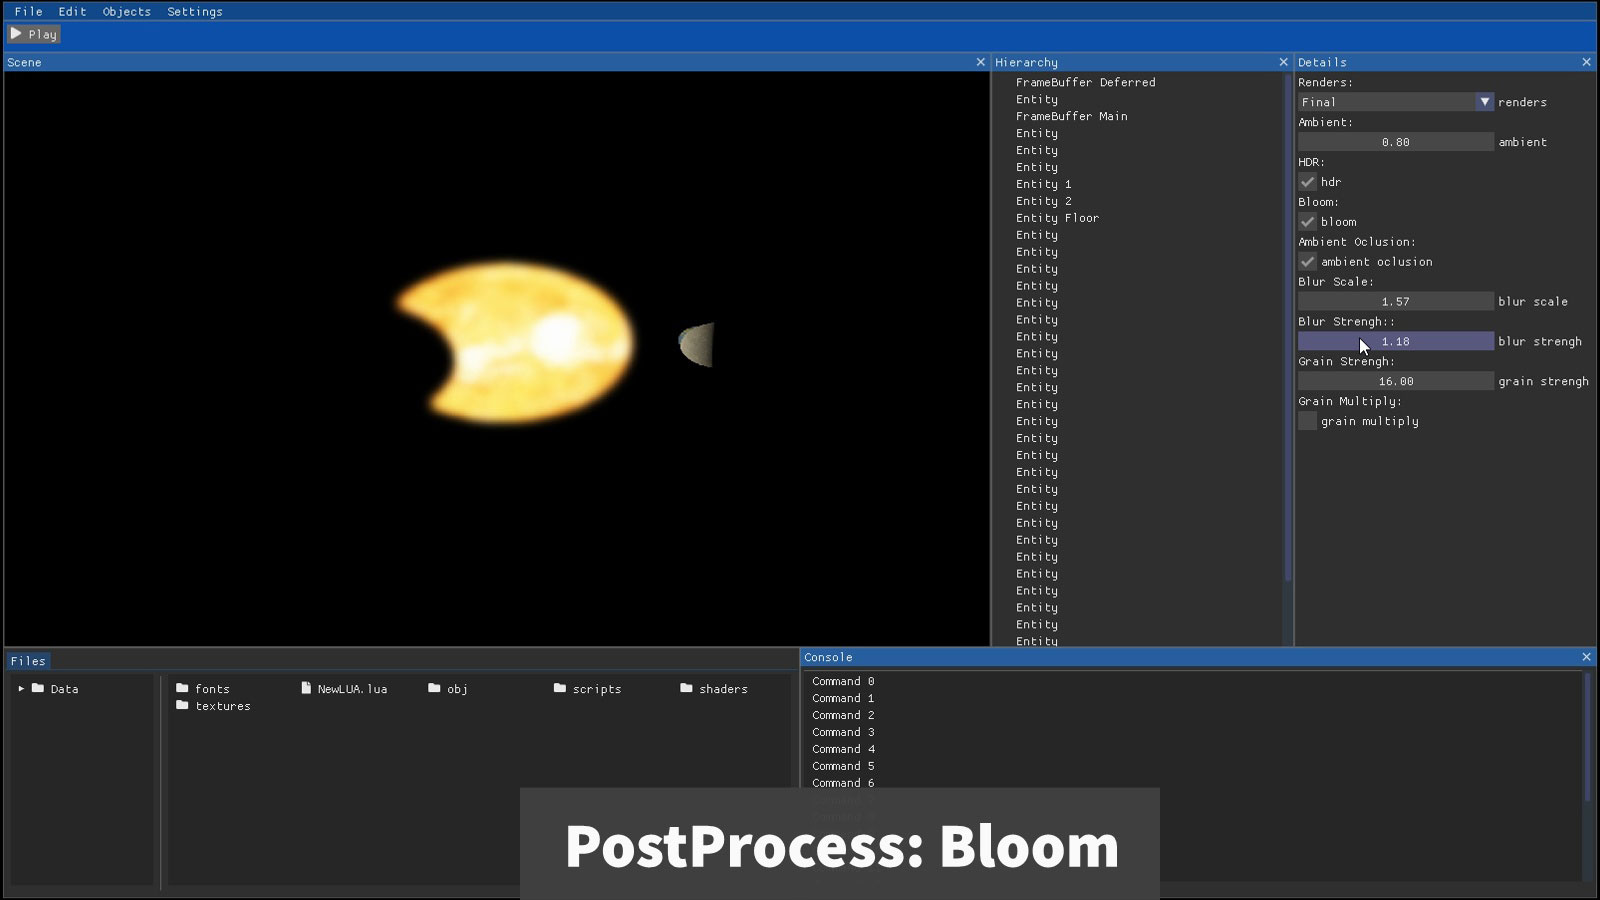
- Postprocess Bloom
- Postprocess HDR
- SSAO
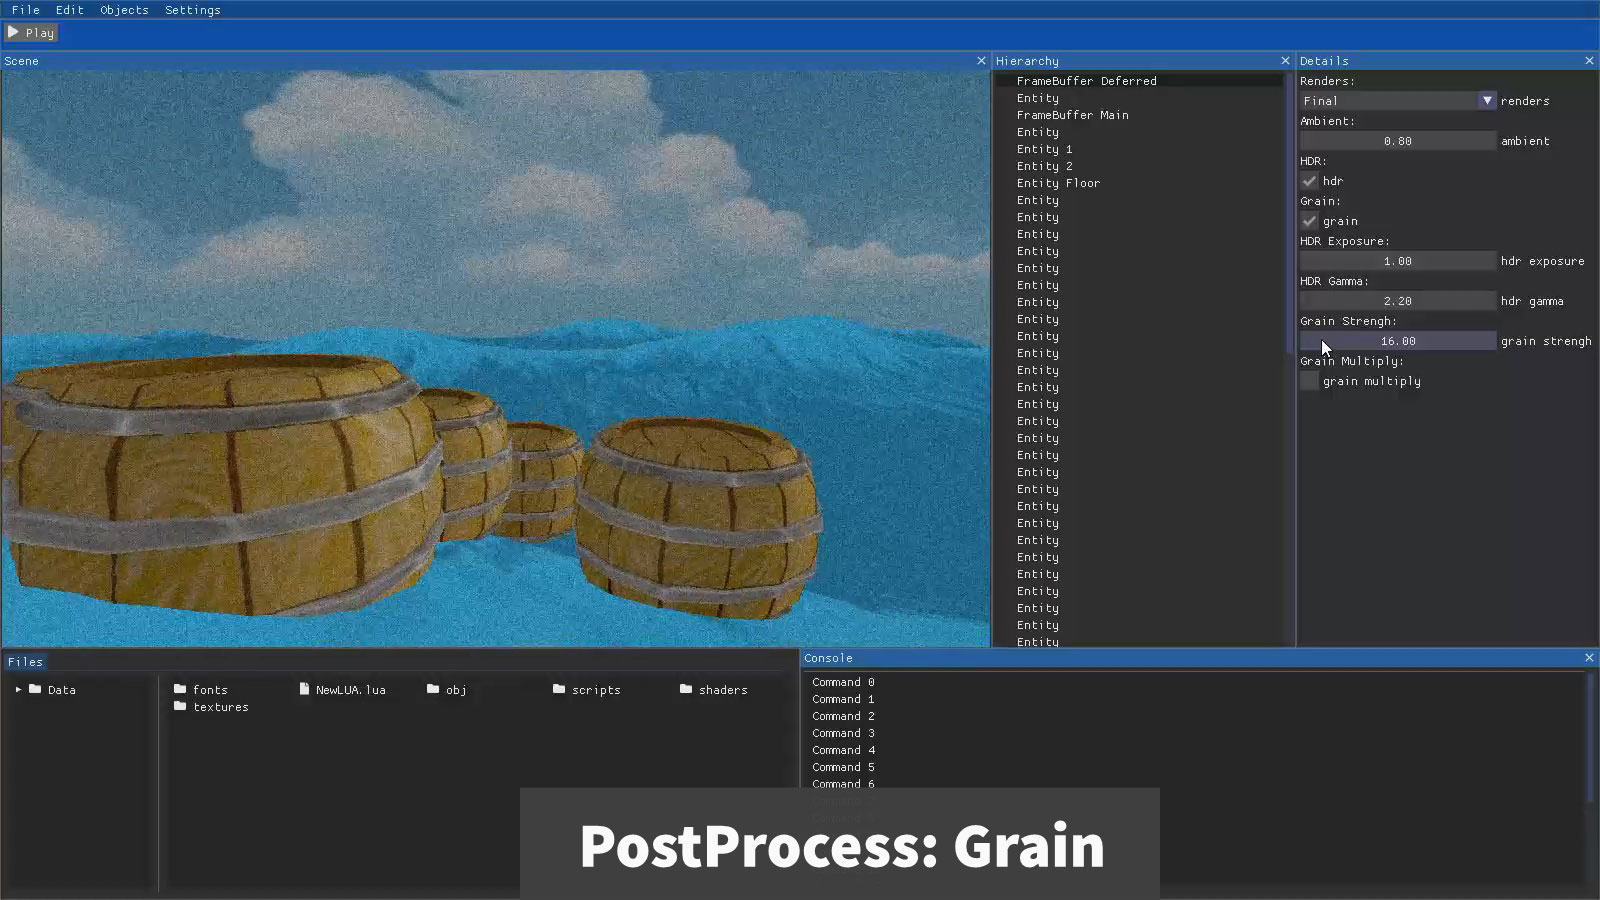
- Postprocess Grain
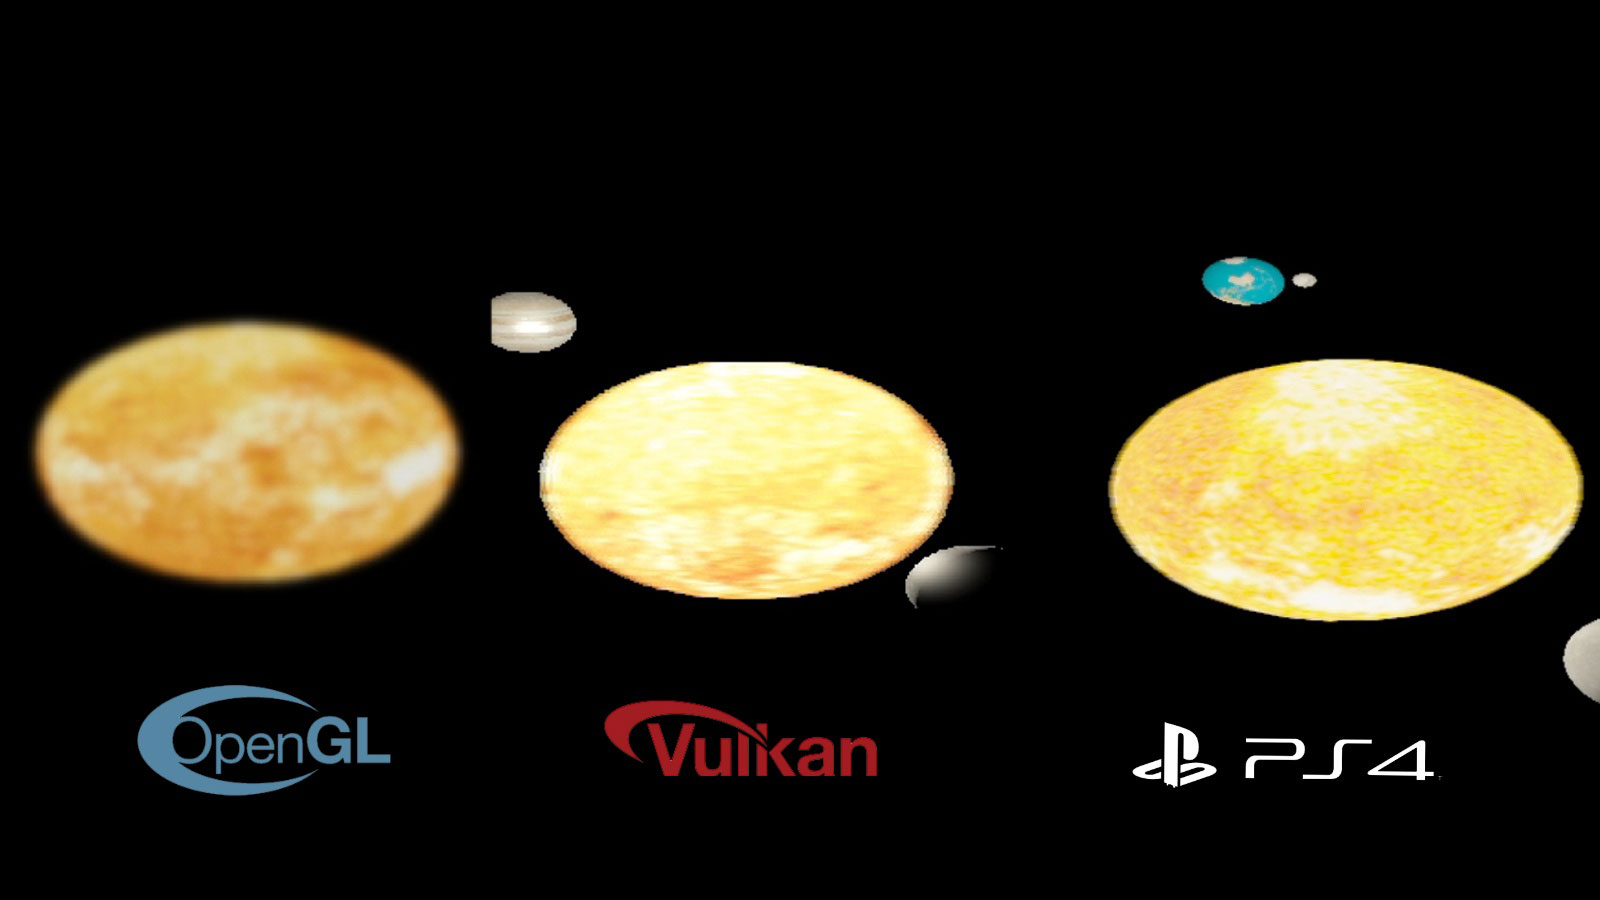
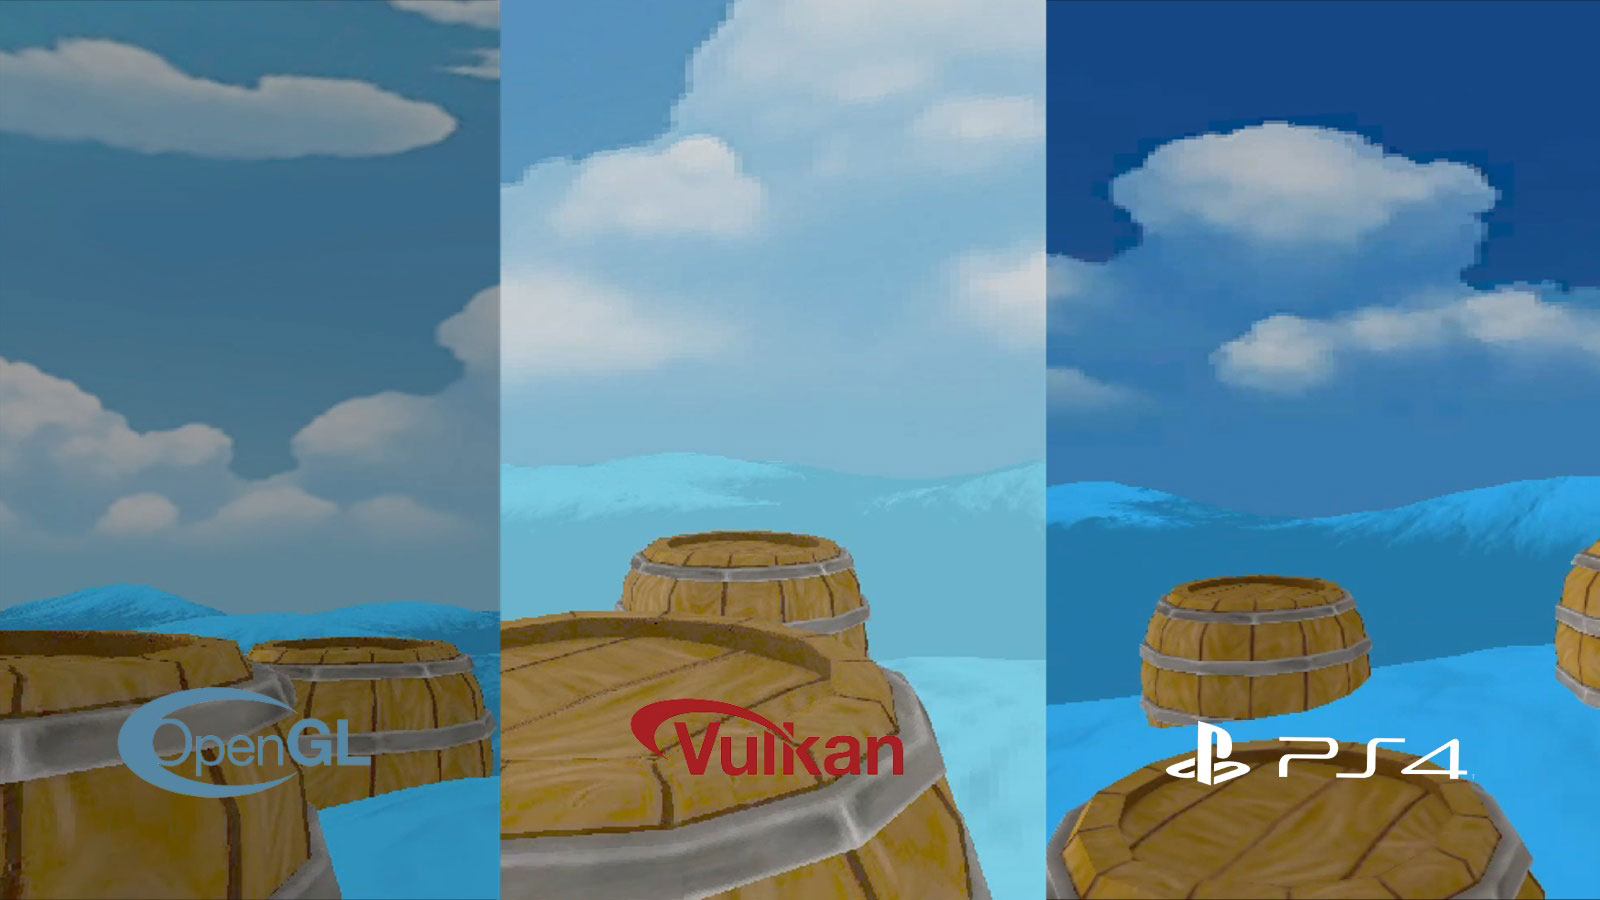
Gallery

Explanation
The most important implemented techniques that have been done for the engine are:
Components are objects that only store local information, for example a local transformation component stores position, rotation and scaling. These components have assigned a bit of the entity to know if that entity contains or not the component, for example a component of the local transformation has assigned the second bit to know if it is added to the entity.
The Entities are an object that stores a bit mask with the bits of the active components, for example if you want to add to the entity the component of the local transformation, the second bit would be set to 1. With this you can know with a check if that entity has a particular component. The Entities also have an id to know where it is within the archetype.
The Archetype is a combination of components, every time a component is added to an entity the component is added to an archetype and the entity is told the id it has in that archetype, it also has a component mask to know which components the archetype has. There is one archetype for each combination of components, so all entities that have the same components are in the same archetype. For example you have 3 entities the first entity contains 2 components, the local transformation component, and the Render component, the second entity has only the local transformation component, and the third entity has the same components as the first entity. This would have created 2 archetypes 1 with the local transformation component, which would be the component of the second entity. Another archetype would also have been created with 2 components, one of local transformation and the other of rendering, in this archetype would be the components of the first and third entity.
Finally, in order to have the correct ECS implementation, the systems are missing. The systems are functions that go through the archetypes looking for the configuration given by the user. For example if you want to paint the objects on screen you have to make a system that runs through all the archetypes until it finds an archetype that contains the Render, Material and Local Transformation components. Once the system has found the archetype it only has to go through it and there is no need to jump in the memory since that archetype has all the components together. You can also indicate if you do not want to access an entity that has a specific component. To know if an archetype has a component, the archetype mask is checked to quickly find the archetypes that meet the condition.
This technique works by doing a first pass of painting where from a RenderTexture 3 textures are obtained, one of positions, another of normals and another of color. As the values that are stored are 3 floats, you can use the alpha of the texture to store other values that occupy a float, for example the specular.
Once the first pass is done where the textures are obtained, a second pass is done where the lighting calculations are applied on the obtained textures. Here is the improvement over the forward rendering since the lighting is only calculated once over the entire scene. An improvement of this would be to use the light volume so that it only calculates the light where the object is inside the light.
With the deferred shading textures we can obtain the position, normals, color and specular. We project the textures on the geometry so that only what the geometry covers is painted, then we apply the lighting calculations by setting a radius limit that is in proportion to the size of the geometry, so that it can not get out of it.
To paint the geometries in the world and make the light calculations well you have to activate the front bullface to paint the back faces of the geometry so it does not disappear when you enter the geometry. Also you have to activate the additive blend ONE ONE. And you have to deactivate the depth so that the lights do not overlap.
The spot light uses a cone-shaped geometry.
The point light uses a sphere-shaped geometry.
The directional light uses a quad that spans the entire screen.
To calculate the specular you have to make a dot product with the direction of the camera and the reflection on the angle at which the light hits it.
With the depth buffer obtained, the texture is passed to the light shader and it is calculated if the point to illuminate is covered by another object, so as not to illuminate and make the shadows.
To see if the object to be illuminated is covered by another object we need the texture of the depth buffer and the z of the vertex to be illuminated. To do this we take the projection of the depth texture and compare it with the z of the vertex, if the z of the vertex to be illuminated is less than the value of the depth, this vertex is illuminated, if it is less it means that it is covered by the other and it is not illuminated.
With this the shadows would be already made but it has acne errors, to solve this it is necessary to apply a bias.
There are 2 types of creating shadows, with an orthographic camera or a perspective camera. With the perspective camera it simulates the effect of a normal light where if the object is close to the light the shadow becomes bigger and if the object is far away it becomes smaller. With the orthographic camera simulates sunlight as the size does not change depending on the proximity of the object to the light, this in the sun occurs because the sun is so far away that it is not appreciated.
In the fragment shader you have to read the cubemap texture with the coordinates of the position of the vertices of the cube since the cube goes from -1 to 1 and the texture is coupled to it.
In the first pass the lights are calculated and with this calculation the brightest pixels are extracted and stored in a texture to then apply the glow. With this RenderTexture 2 textures are obtained, one of the calculation of lights and another of the glow of the objects.
Now we have to make a gaussian blur to the image, for this we use 2 RenderTexture that are alternating. Each RenderTexture makes a blur of the image that is passed to it, for each pass the blur is made once horizontally and once vertically. When a RenderTexture finishes it passes the resulting texture to the other RenderTexture so that the blur accumulates and is more blurred. To make the blur you take the texture that receives the RenderTexture and mix the colors next to it, as many as you decide to implement, for example with an offset of 5 you would take the 5 on the left and the 5 on the right and mix them with a sum. The first texture that is passed to these 2 RenderTexture is the texture that we have obtained with the glows.
When you have the texture with the gaussian blur applied you have to make a last pass to join the blurred texture with the texture of the lights with a sum. And finally we have to transform it from HDR to LDR to represent the colors on screen.
Finally, as an example, an emissive value has been implemented to make an object shine without being affected by the lights. To do this we have added an emissive variable to the objects and these with that value fill the texture of brightness, in order to apply the bloom effect.
To make the SSAO we need samples in tangent space to check if the points are there, these samples are obtained assuming that the point is in positive z, we take random points between -1.0 and 1.0 for the x and y, and between 0.0 and 1.0 for the z to make the semi-sphere of samples..
To simplify the amount of samples we have to create a 4x4 texture to put random rotation points, this texture has to be repeated to distribute these points all over the screen.
With this information it is necessary to pass the points of the tangent space to the view space, for it is calculated the tangent of the texture 4x4, the bitangent of the normals with the tangent and with the tangent, bitangent and the normals the matrix is created to pass from the tangent space to the view space, for it is multiplied the matrix that we have obtained by each sample. Then each sample is taken from the hemisphere, it is passed to the view space and the current position of the fragment is added to it, in order to compare the depth, for this the sample in view space is added to the position of the vertex and the projection is multiplied to put it in the clipping space and check the depth. With this we take out the shading that the objects have by the ambient occlusion.
When you have the shading you have to make a blur to soften the effect. To make the blur you have to mix the colors of the shaded texture with an offset, for example adding the 9 pixels around it.
ECS
To implement ECS you must have 3 objects, the Entities, the Components and the Archetypes.Components are objects that only store local information, for example a local transformation component stores position, rotation and scaling. These components have assigned a bit of the entity to know if that entity contains or not the component, for example a component of the local transformation has assigned the second bit to know if it is added to the entity.
The Entities are an object that stores a bit mask with the bits of the active components, for example if you want to add to the entity the component of the local transformation, the second bit would be set to 1. With this you can know with a check if that entity has a particular component. The Entities also have an id to know where it is within the archetype.
The Archetype is a combination of components, every time a component is added to an entity the component is added to an archetype and the entity is told the id it has in that archetype, it also has a component mask to know which components the archetype has. There is one archetype for each combination of components, so all entities that have the same components are in the same archetype. For example you have 3 entities the first entity contains 2 components, the local transformation component, and the Render component, the second entity has only the local transformation component, and the third entity has the same components as the first entity. This would have created 2 archetypes 1 with the local transformation component, which would be the component of the second entity. Another archetype would also have been created with 2 components, one of local transformation and the other of rendering, in this archetype would be the components of the first and third entity.
Finally, in order to have the correct ECS implementation, the systems are missing. The systems are functions that go through the archetypes looking for the configuration given by the user. For example if you want to paint the objects on screen you have to make a system that runs through all the archetypes until it finds an archetype that contains the Render, Material and Local Transformation components. Once the system has found the archetype it only has to go through it and there is no need to jump in the memory since that archetype has all the components together. You can also indicate if you do not want to access an entity that has a specific component. To know if an archetype has a component, the archetype mask is checked to quickly find the archetypes that meet the condition.
Deferred Shading
Deferred Shading consists in saving the information in textures in order to make calculations on them. This technique is more efficient than forward rendering especially when there are many small lights.This technique works by doing a first pass of painting where from a RenderTexture 3 textures are obtained, one of positions, another of normals and another of color. As the values that are stored are 3 floats, you can use the alpha of the texture to store other values that occupy a float, for example the specular.
Once the first pass is done where the textures are obtained, a second pass is done where the lighting calculations are applied on the obtained textures. Here is the improvement over the forward rendering since the lighting is only calculated once over the entire scene. An improvement of this would be to use the light volume so that it only calculates the light where the object is inside the light.
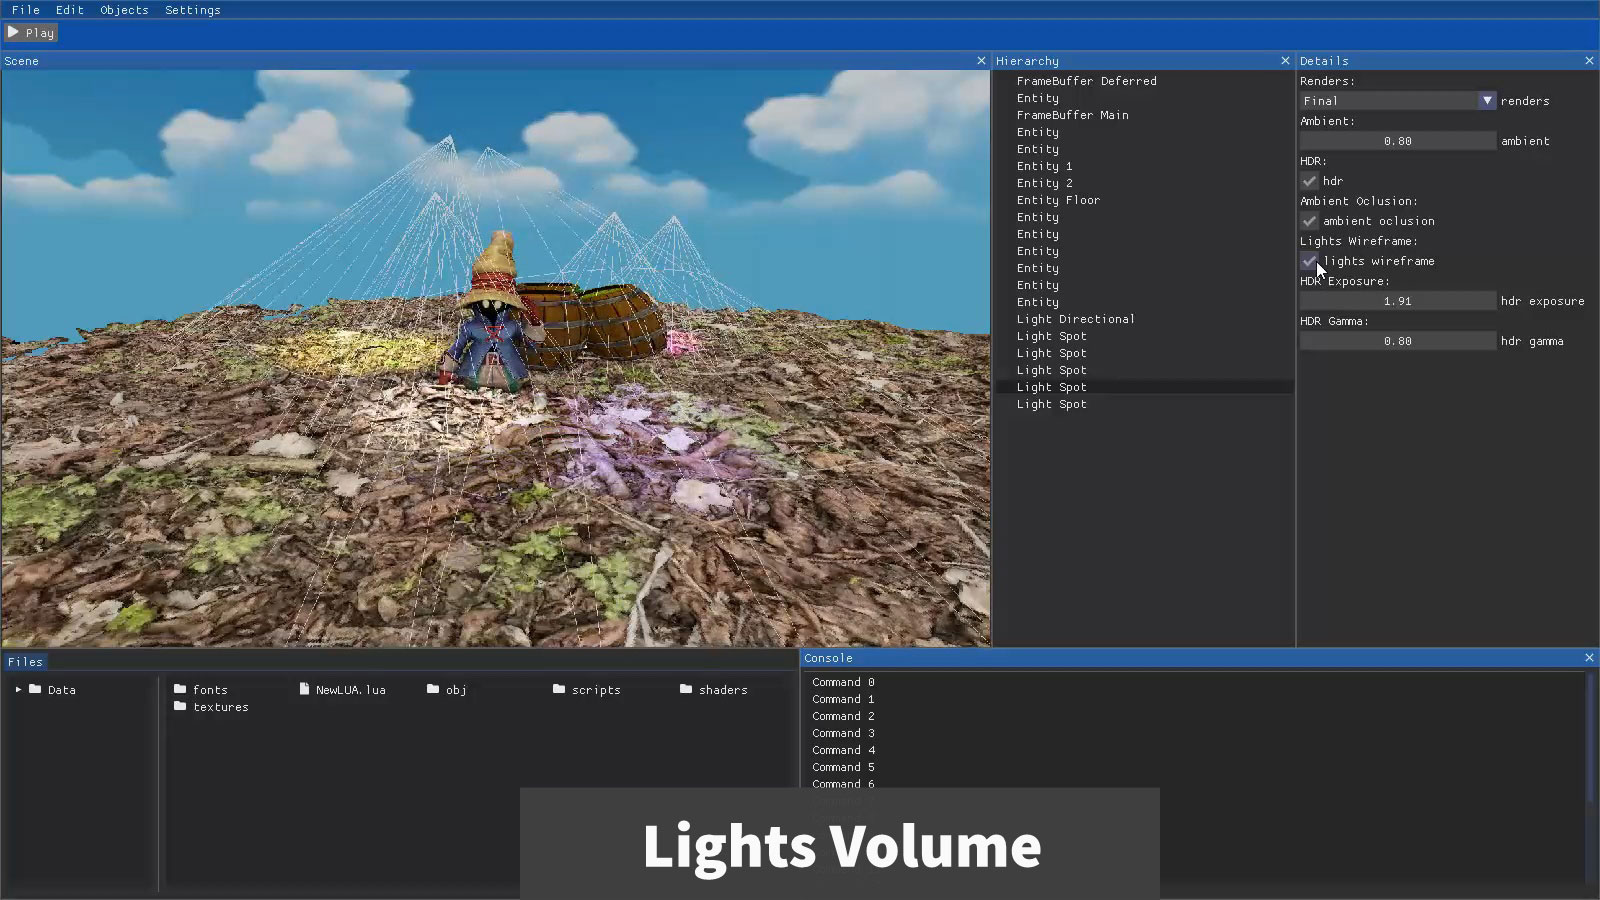
Light Volume
To improve the lighting calculation with deferred shading we can add geometries to the lights to check if the objects are inside the geometry and apply the light calculations.With the deferred shading textures we can obtain the position, normals, color and specular. We project the textures on the geometry so that only what the geometry covers is painted, then we apply the lighting calculations by setting a radius limit that is in proportion to the size of the geometry, so that it can not get out of it.
To paint the geometries in the world and make the light calculations well you have to activate the front bullface to paint the back faces of the geometry so it does not disappear when you enter the geometry. Also you have to activate the additive blend ONE ONE. And you have to deactivate the depth so that the lights do not overlap.
The spot light uses a cone-shaped geometry.
The point light uses a sphere-shaped geometry.
The directional light uses a quad that spans the entire screen.
Lights
There are 3 types of lights, the directional, the spot, and the point. For the calculation of lights it is necessary to verify where the normals of the objects are looking, for it the normals are multiplied by the model to know where the normals are looking at every moment. With that a dot product is made with the direction of the light and the normals, to know if that part of the object is illuminated or shaded. In addition, external values must be added to the light, such as the strength of the environment and the specular of the object, which indicates how the light interacts, if it scatters or bounces.To calculate the specular you have to make a dot product with the direction of the camera and the reflection on the angle at which the light hits it.
Shadow Mapping
This technique requires a camera in the position and rotation of the light that is going to apply the shadows, in order to use a RenderTexture with this camera and get the depth buffer.With the depth buffer obtained, the texture is passed to the light shader and it is calculated if the point to illuminate is covered by another object, so as not to illuminate and make the shadows.
To see if the object to be illuminated is covered by another object we need the texture of the depth buffer and the z of the vertex to be illuminated. To do this we take the projection of the depth texture and compare it with the z of the vertex, if the z of the vertex to be illuminated is less than the value of the depth, this vertex is illuminated, if it is less it means that it is covered by the other and it is not illuminated.
With this the shadows would be already made but it has acne errors, to solve this it is necessary to apply a bias.
There are 2 types of creating shadows, with an orthographic camera or a perspective camera. With the perspective camera it simulates the effect of a normal light where if the object is close to the light the shadow becomes bigger and if the object is far away it becomes smaller. With the orthographic camera simulates sunlight as the size does not change depending on the proximity of the object to the light, this in the sun occurs because the sun is so far away that it is not appreciated.
Skybox
You have to create a cube and in the shader in the view projection calculation you have to remove the translation from the view so that the skybox stays fixed and you can't go through it.In the fragment shader you have to read the cubemap texture with the coordinates of the position of the vertices of the cube since the cube goes from -1 to 1 and the texture is coupled to it.
Bloom
To implement this technique you have to use the RenderTexture to extract and store the information.In the first pass the lights are calculated and with this calculation the brightest pixels are extracted and stored in a texture to then apply the glow. With this RenderTexture 2 textures are obtained, one of the calculation of lights and another of the glow of the objects.
Now we have to make a gaussian blur to the image, for this we use 2 RenderTexture that are alternating. Each RenderTexture makes a blur of the image that is passed to it, for each pass the blur is made once horizontally and once vertically. When a RenderTexture finishes it passes the resulting texture to the other RenderTexture so that the blur accumulates and is more blurred. To make the blur you take the texture that receives the RenderTexture and mix the colors next to it, as many as you decide to implement, for example with an offset of 5 you would take the 5 on the left and the 5 on the right and mix them with a sum. The first texture that is passed to these 2 RenderTexture is the texture that we have obtained with the glows.
When you have the texture with the gaussian blur applied you have to make a last pass to join the blurred texture with the texture of the lights with a sum. And finally we have to transform it from HDR to LDR to represent the colors on screen.
Finally, as an example, an emissive value has been implemented to make an object shine without being affected by the lights. To do this we have added an emissive variable to the objects and these with that value fill the texture of brightness, in order to apply the bloom effect.
HDR
The colors in RGB go from 0 to 1 and this can be a problem when you have lights affecting areas that are illuminated a lot, since the color is limited and the result cannot be represented well. For that you have to make the lighting calculations in HDR and then in the final texture make the conversion from HDR to LDR to be able to represent them. To do this we must divide the HDR values obtained by its own value plus 1, so that it is bounded between 0 and 1. With this we have more adequate light colors, now we need to apply the Gamma Correction to have more stable colors.SSAO
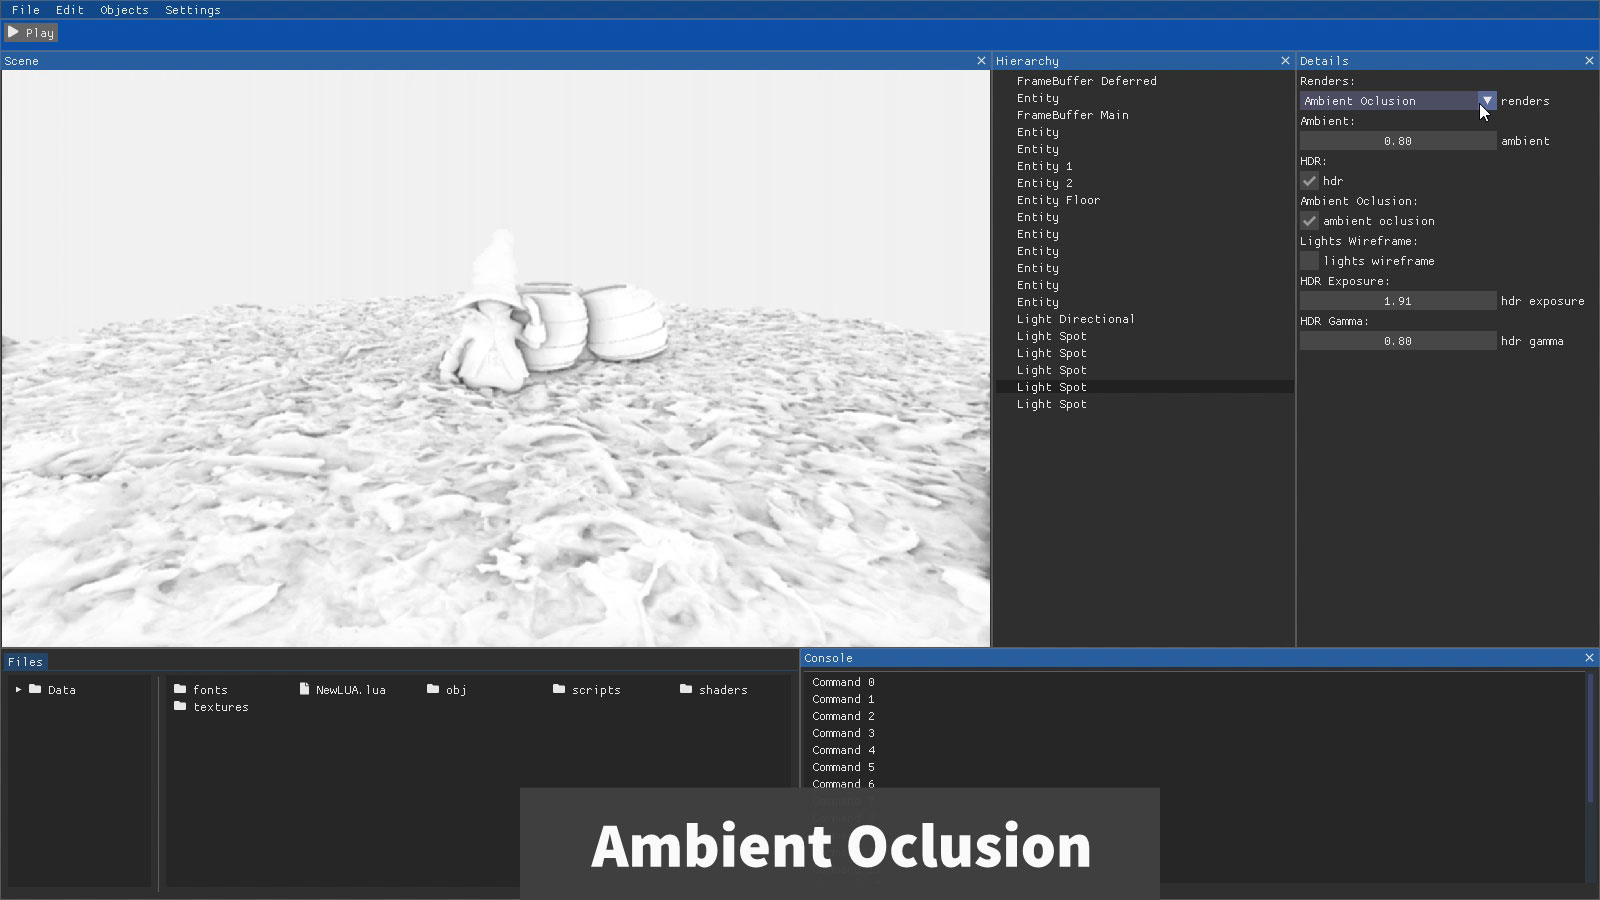
The technique to implement Ambient Occlusion is SSAO, the first step to implement SSAO is to make a first pass obtaining the position and normals with the vertex values by the view and the model to put the objects in space view.To make the SSAO we need samples in tangent space to check if the points are there, these samples are obtained assuming that the point is in positive z, we take random points between -1.0 and 1.0 for the x and y, and between 0.0 and 1.0 for the z to make the semi-sphere of samples..
To simplify the amount of samples we have to create a 4x4 texture to put random rotation points, this texture has to be repeated to distribute these points all over the screen.
With this information it is necessary to pass the points of the tangent space to the view space, for it is calculated the tangent of the texture 4x4, the bitangent of the normals with the tangent and with the tangent, bitangent and the normals the matrix is created to pass from the tangent space to the view space, for it is multiplied the matrix that we have obtained by each sample. Then each sample is taken from the hemisphere, it is passed to the view space and the current position of the fragment is added to it, in order to compare the depth, for this the sample in view space is added to the position of the vertex and the projection is multiplied to put it in the clipping space and check the depth. With this we take out the shading that the objects have by the ambient occlusion.
When you have the shading you have to make a blur to soften the effect. To make the blur you have to mix the colors of the shaded texture with an offset, for example adding the 9 pixels around it.